Recording Studio Build #7 – Acoustic Treatment: Shaping Sound

Now that the studio has been fully soundproofed, the reverb is absolutely insane (around 2 seconds). So insane that you can barely hold a conversation inside. This means that soundproofing is pretty good as most of the energy remains inside. It also means a lot of acoustic treatment is still needed before making any serious music in there!
Without Treatment
Here is an idea of the insane reverb in the room before applying any acoustic treatment (apart from the panel you can see behind me):
Crazy for such a small space, isn’t it?
Quick Testing with Panels
I had the opportunity to get thin movable acoustic panels for a very cheap price, so I ordered quite a few. Even though they will not fit for proper studio treatment, they will be useful as gobos later.
Here is the same take with these absorbers around the room on the vertical walls (none on the ceiling):
Quite a change, right?
I have used these panels for a few days for initial testing, moving them around, to get an idea of how much treatment I would need to make this room dry enough.
Room Acoustics Specification
Before treating the room, you need to define what you want to do with it and how it should behave. A mastering room is quite different from a recording room for example!
In my case here I need something quite flexible, as it will be used mainly as a rehearsal and recording room. Since most of the recording is direct (guitars, bass and keyboards are not recorded with microphones), the main instrument(s) that may be impacted by the room are drums/percussions and maybe vocals.
And for these I’d like to be able to add reverbs and effects after recording, so my room should be quite neutral, with few early reflections and low reverberation next to the acoustical instruments. It is also important for musicians playing in the room not to be flooded with reverb.
In case I want to have more natural reverb, I’d like to keep a (slightly more) “lively” zone, on the other side of the room, so that I can place microphones out there to capture the “room” sound.
Summary:
- Strong absorption close the instruments & musicians (back of the room): better clarity for musicians while playing, and more neutral recordings of acoustical instruments.
- Less absorption (but still short reverb time) on the lively part of the room (front of the room).
Step-By-Step Method
Having a better idea of my needs, I ordered acoustic panels and bass traps from GIK Acoustics. I am not affiliated to them in any way, but I definitely recommend these. Their price is reasonable and the quality is here.
As this is my first real world experience with room treatment, I have decided to proceed slowly, and add panels one-by-one, measuring the room every-time to study the influence of each iteration.
I have used the free Room EQ Wizard (REW) software that helps measuring room acoustics and identify major resonances.
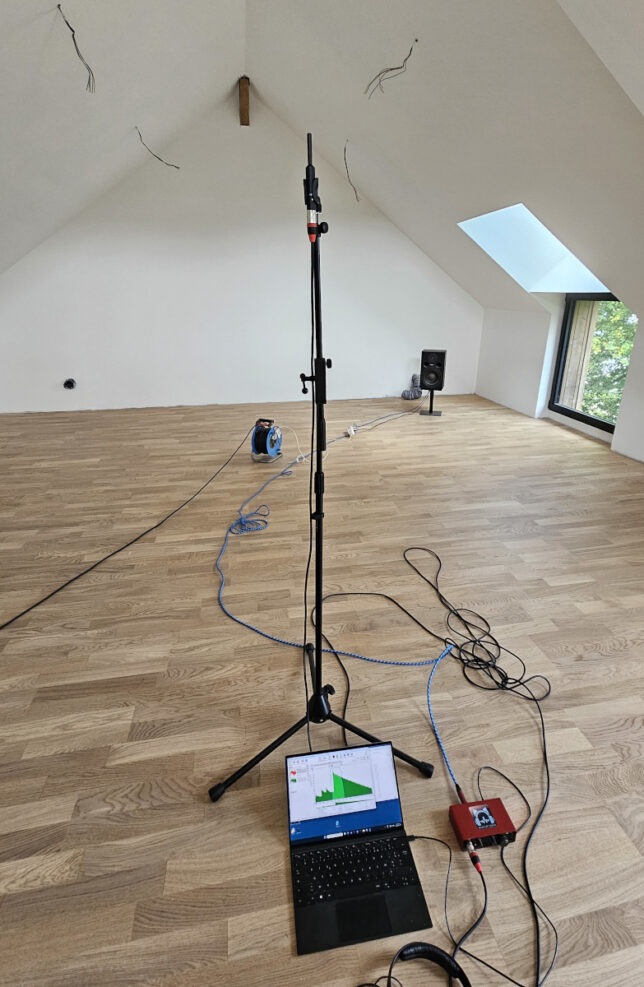
The only extra things you need are a speaker (preferably a studio monitor with roughly flat response), a measurement microphone (preferably as flat as possible, and with a calibration file for corrections, although it is not really necessary here), an audio interface and a computer.
Oh and some good earplugs too, as you don’t want to damage your ears while measuring the room (it can be loud and nasty for the ears).
I have used a beyerdynamic MM 1 with its calibration file, which is not too expensive and works well.
By measuring the room between every single change, it is possible to understand the effect of the panels on the entire spectrum and adjust the positions accordingly.
Initial Measurements
As you may expect, the initial measurements are scary, but this will be our reference, which will let us know how the acoustic treatment affects the response of the room.
I have mostly used the RT60 and spectrogram views. RT60 shows you the reverb length of the room at various frequencies, while the spectrogram view is simply the spectral response of the room over time.
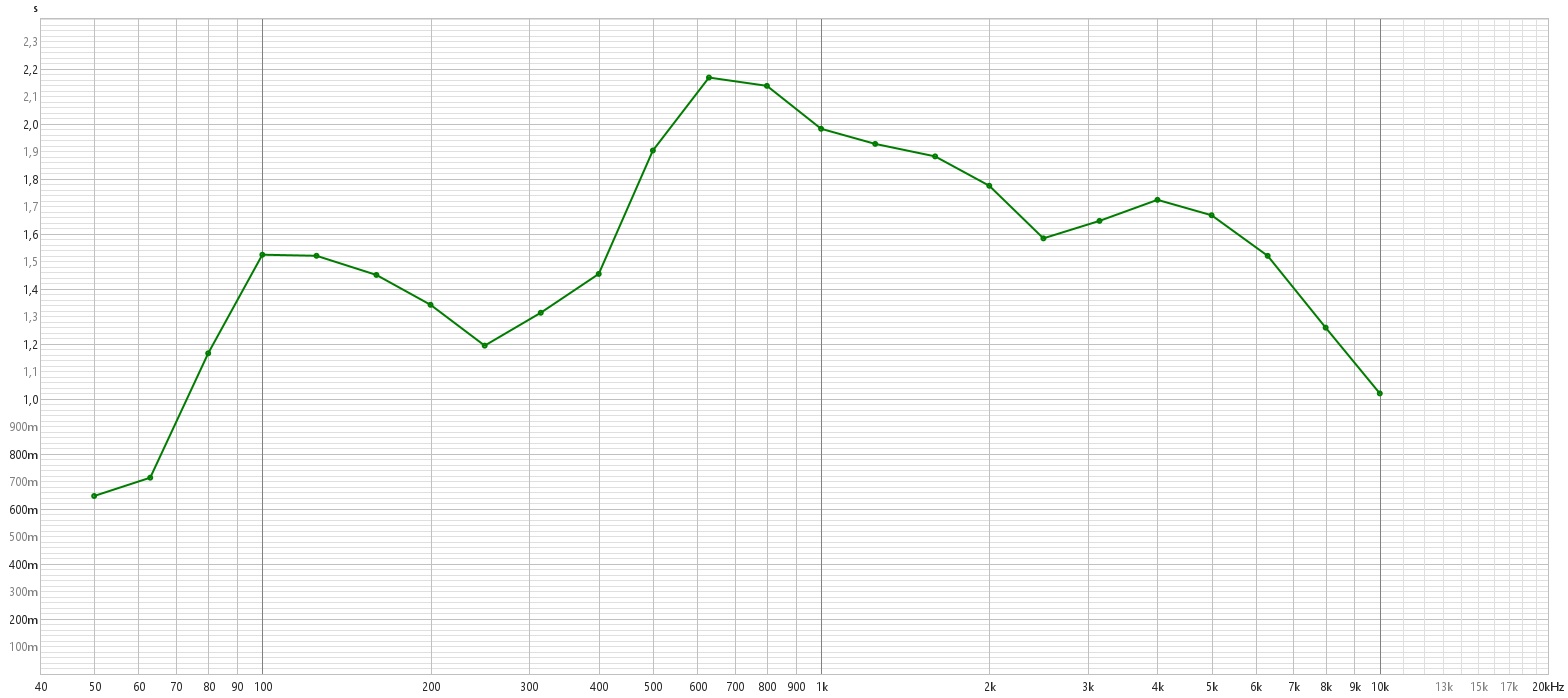
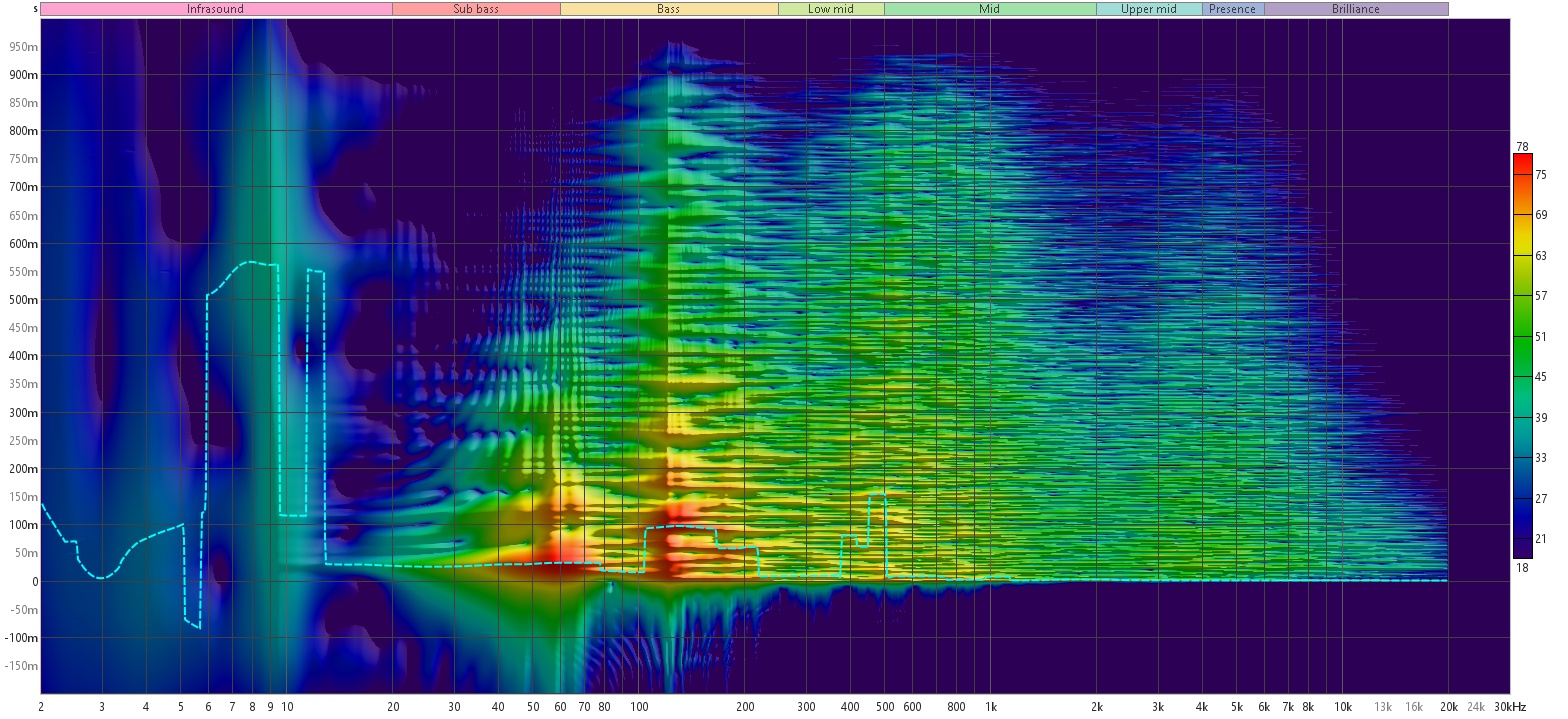
I won’t share all intermediate results here (it’s a lot of data!), but I have measured the room from various locations between each panel to find the right placement and verify the effect on the room acoustics.
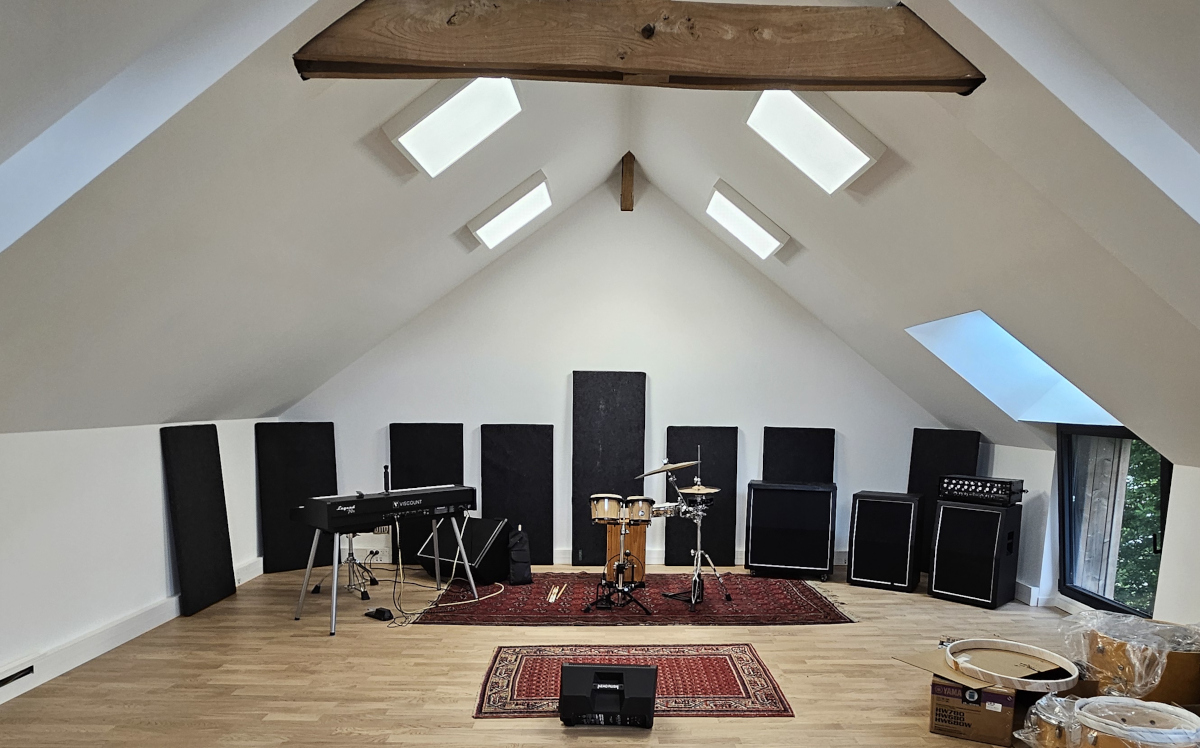
Corners
I have placed triangular bass trap first in all corners of the room to absorb as much bass as possible around the ground. However with the shape of the room (under the roof), it only represents a tiny area, so it does not absorb that much bass.
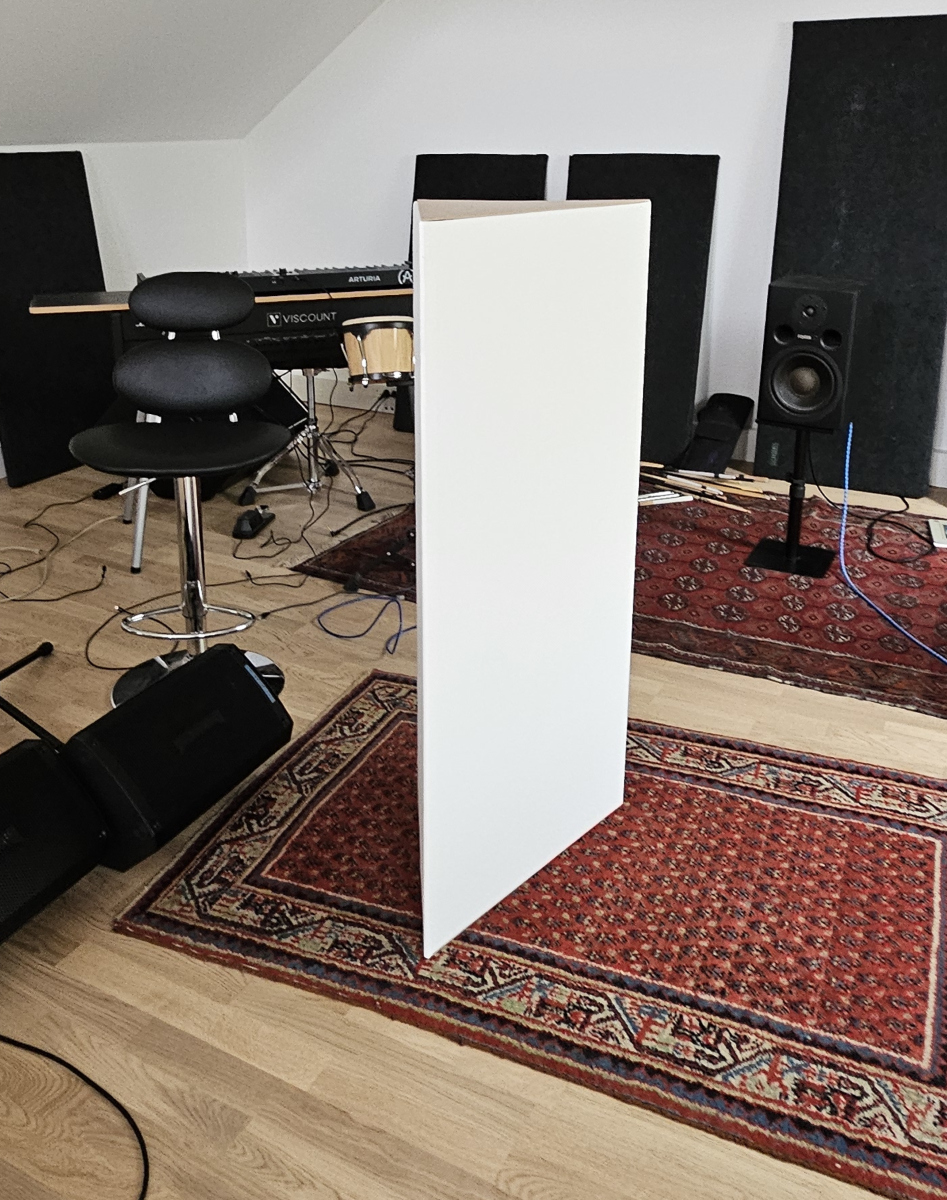
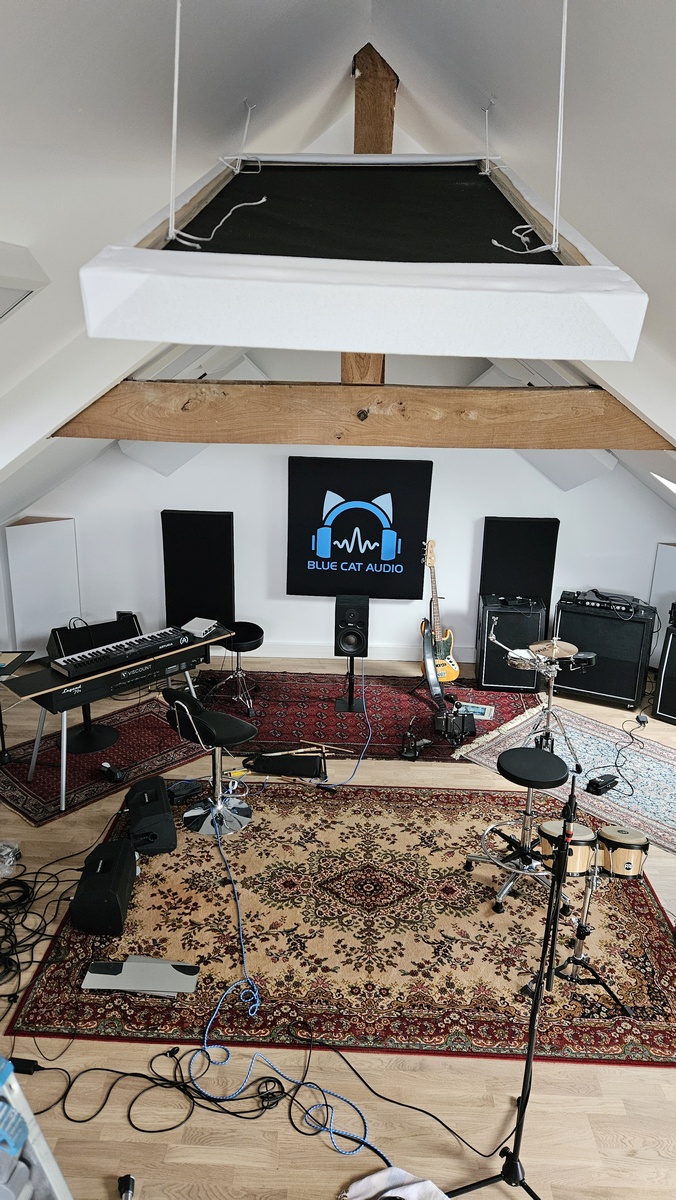
That’s why I have also added (thinner) bass traps in the corners of the ceiling behind the drum kit:
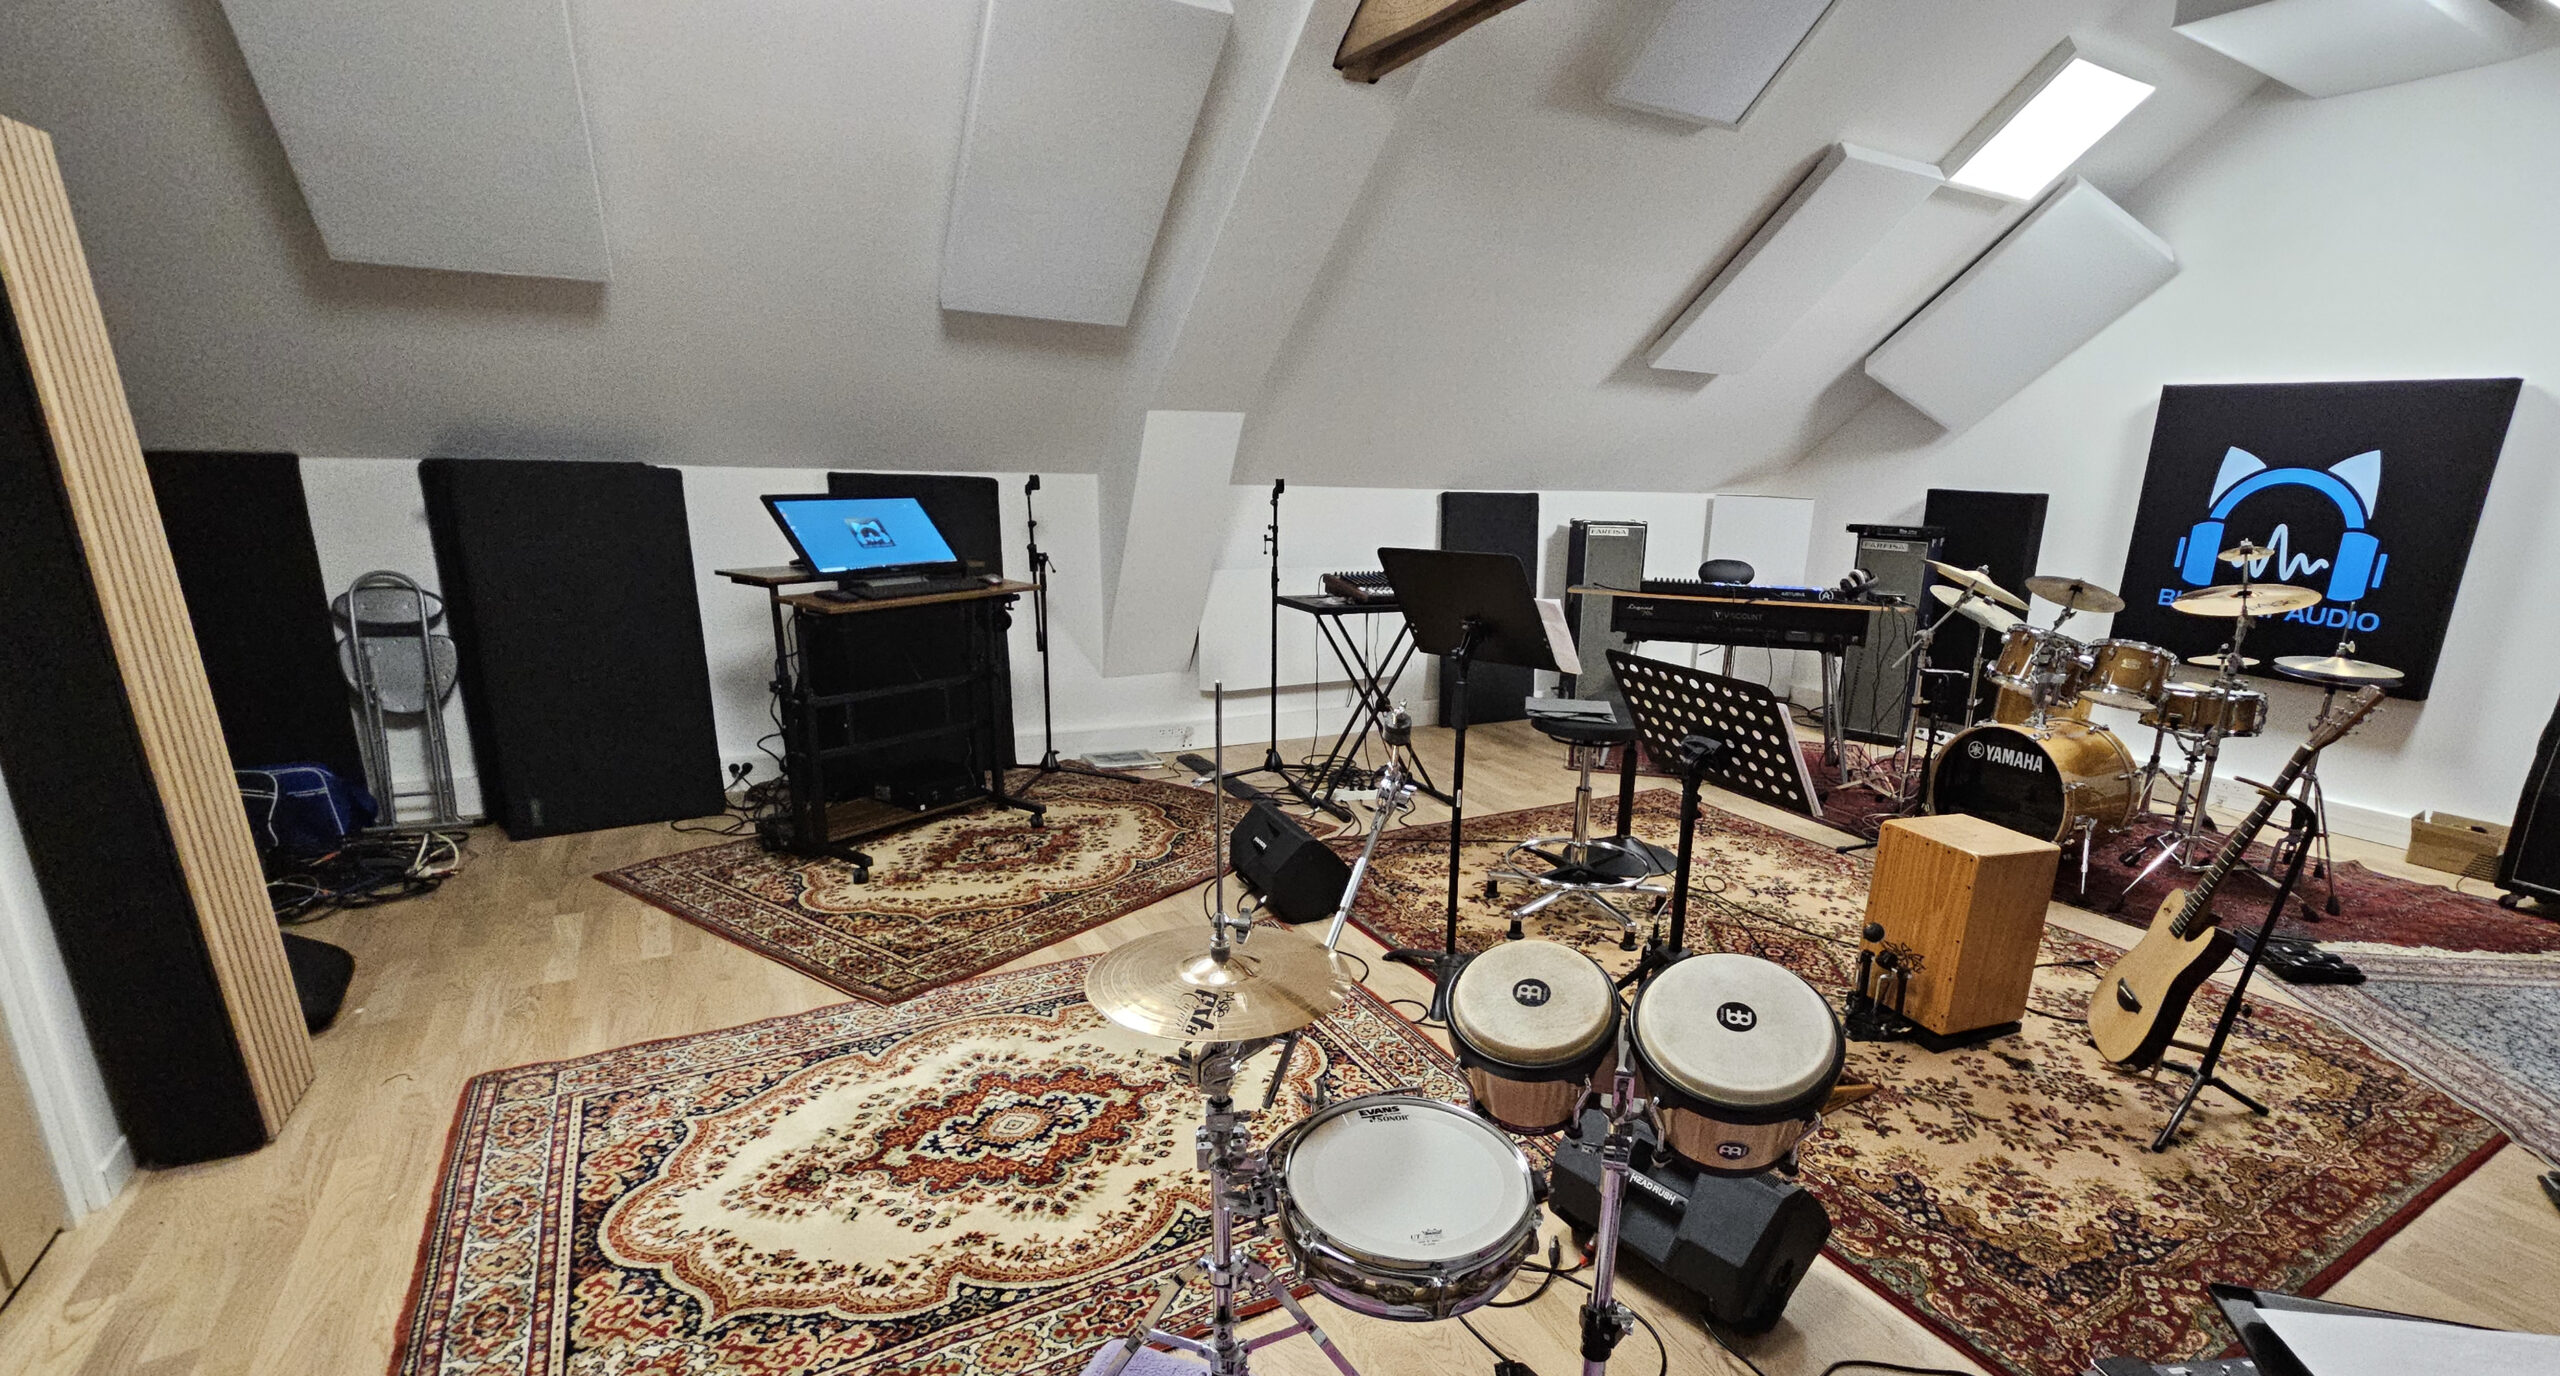
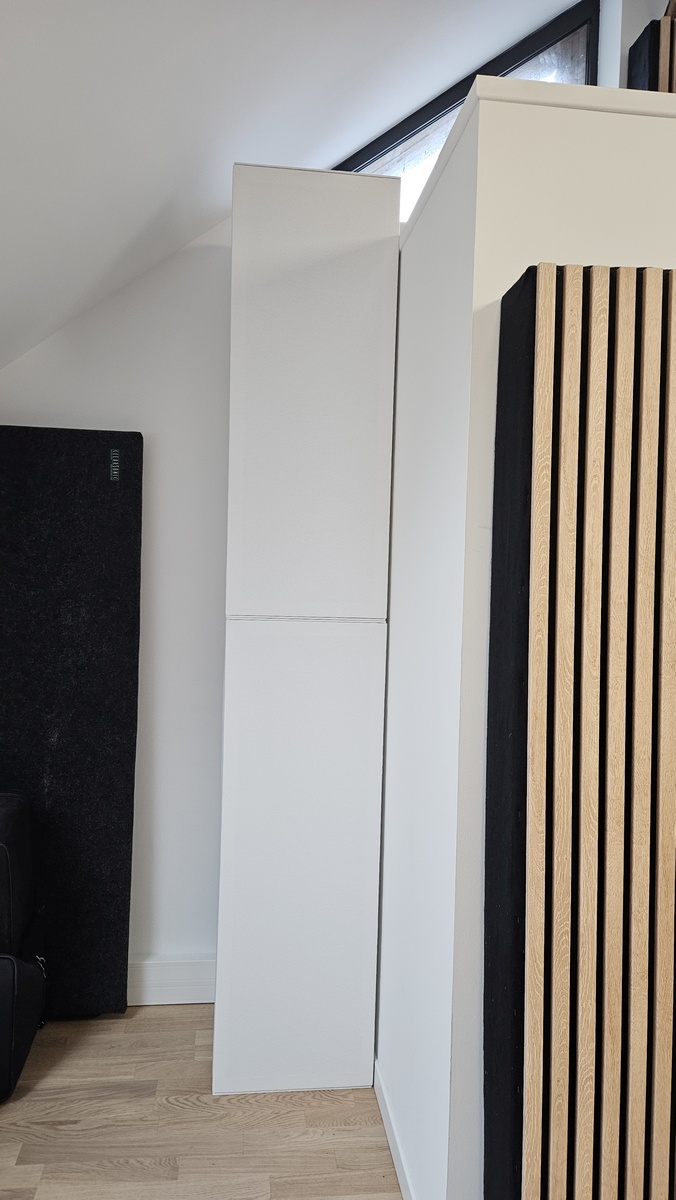
Walls
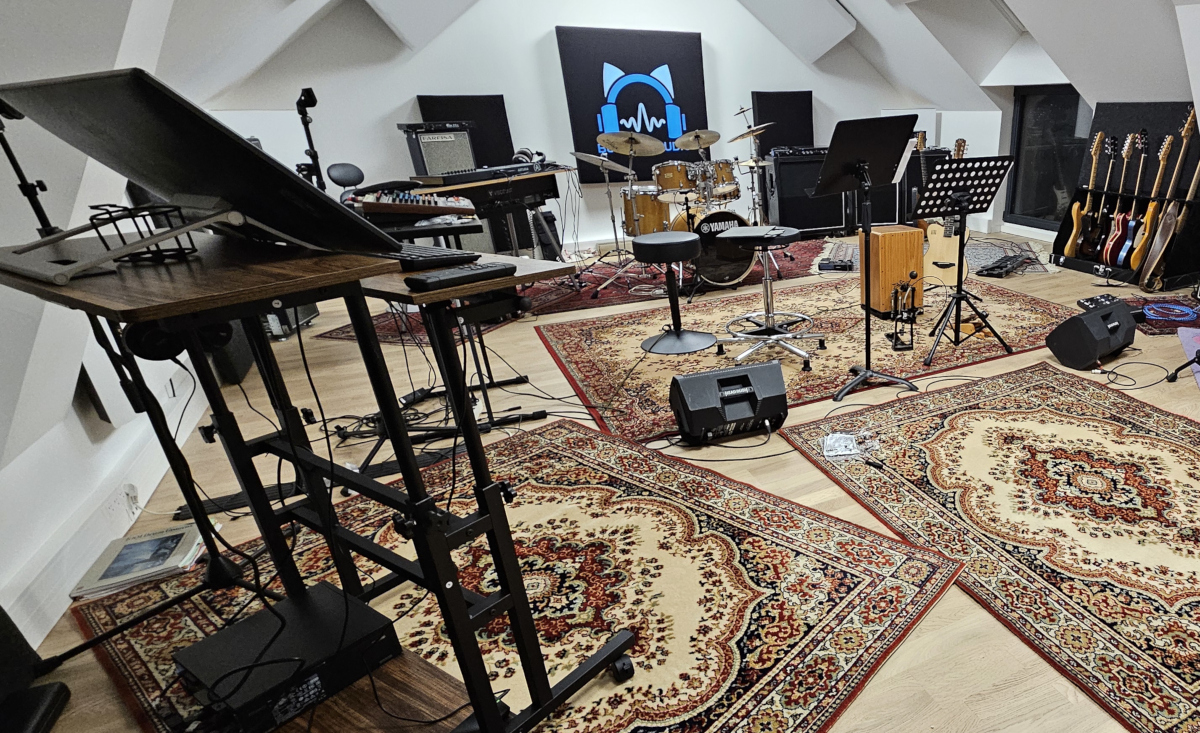
I have kept the cheap panels for the side walls, as they are not very thick and already absorb pretty well. They are placed all around the room, and I have tried to make sure they are not facing each other, to maximize absorption.
On the main wall (behind the future drum kit) however, I have use thicker and larger panels order to absorb lower frequencies as well.
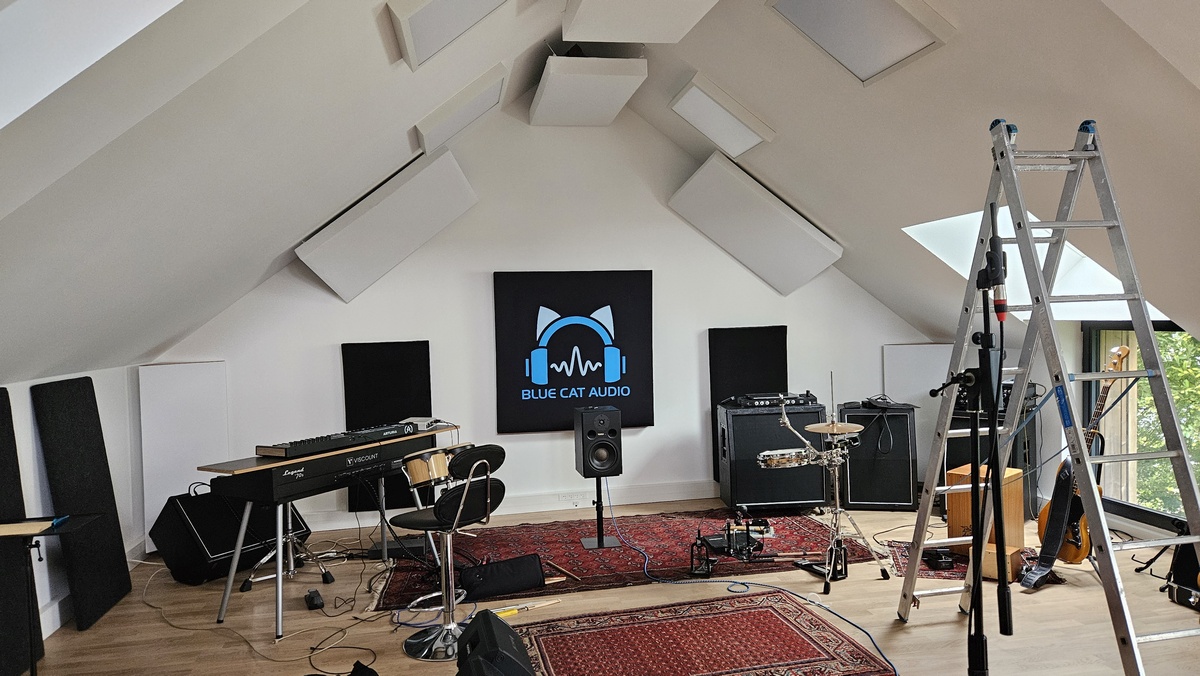
As you can see the placement on the back wall is symmetrical, in order to keep a good stereo balance in the room.
I have also used self-made bass traps with cheap diffusion on the other side of the room, to try to capture as much bass as possible and not over-absorb higher frequencies in the (a bit more) “lively” part of the room.
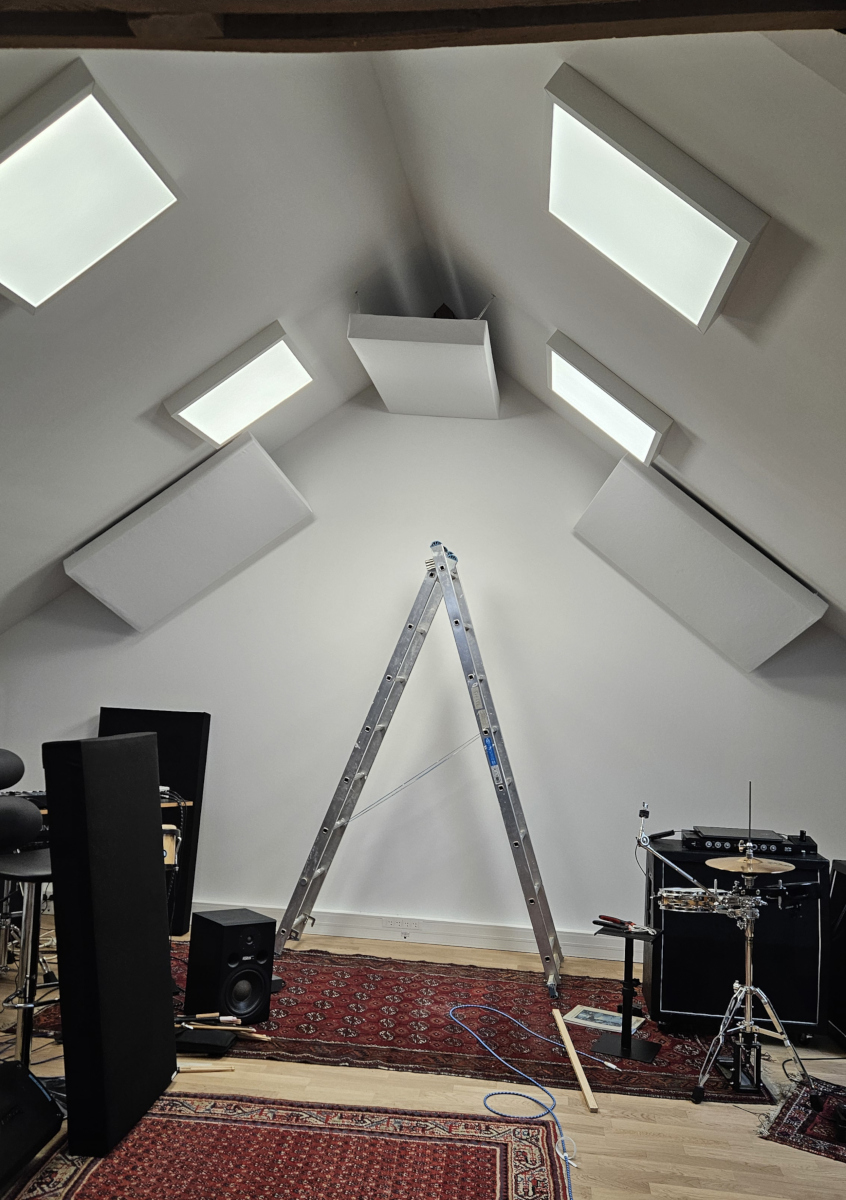
Ceiling
The ceiling is a bit problematic due to its shape (it’s not easy to attach heavy panels on such a surface).
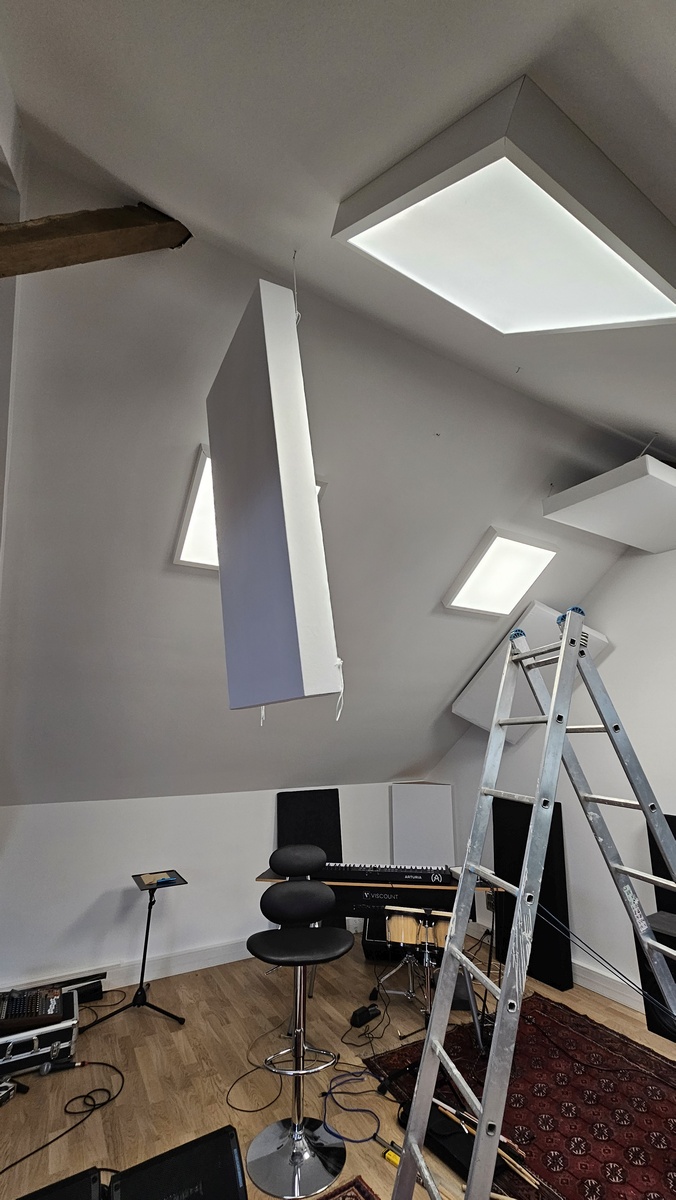
The good news is that there is an extra corner at the top, so that’s where you can trap quite a few resonances.
Rugs on the Floor
There is nothing like good old rugs to tame higher frequencies from the floor! And I like the look too! I have found a couple of used rugs to fill a large part of the wood floor.
It also helps with the propagation of structure-borne noise, and in case someone drops an object on the floor it won’t be as loud as on the wood. And last but not least, it will feel warmer under the feet in winter!
Windows
There are still some problematic areas with odd resonances in the low-end, especially next to the windows. I could probably place some gobos in front of the floor windows, but I haven’t felt the need to do so yet: I preferred to move away people and instruments from these areas instead of wasting the natural light coming from these windows.
Room Response
After placing all these panels on the walls and rugs on the floor, the room response is much better, as you can see below:
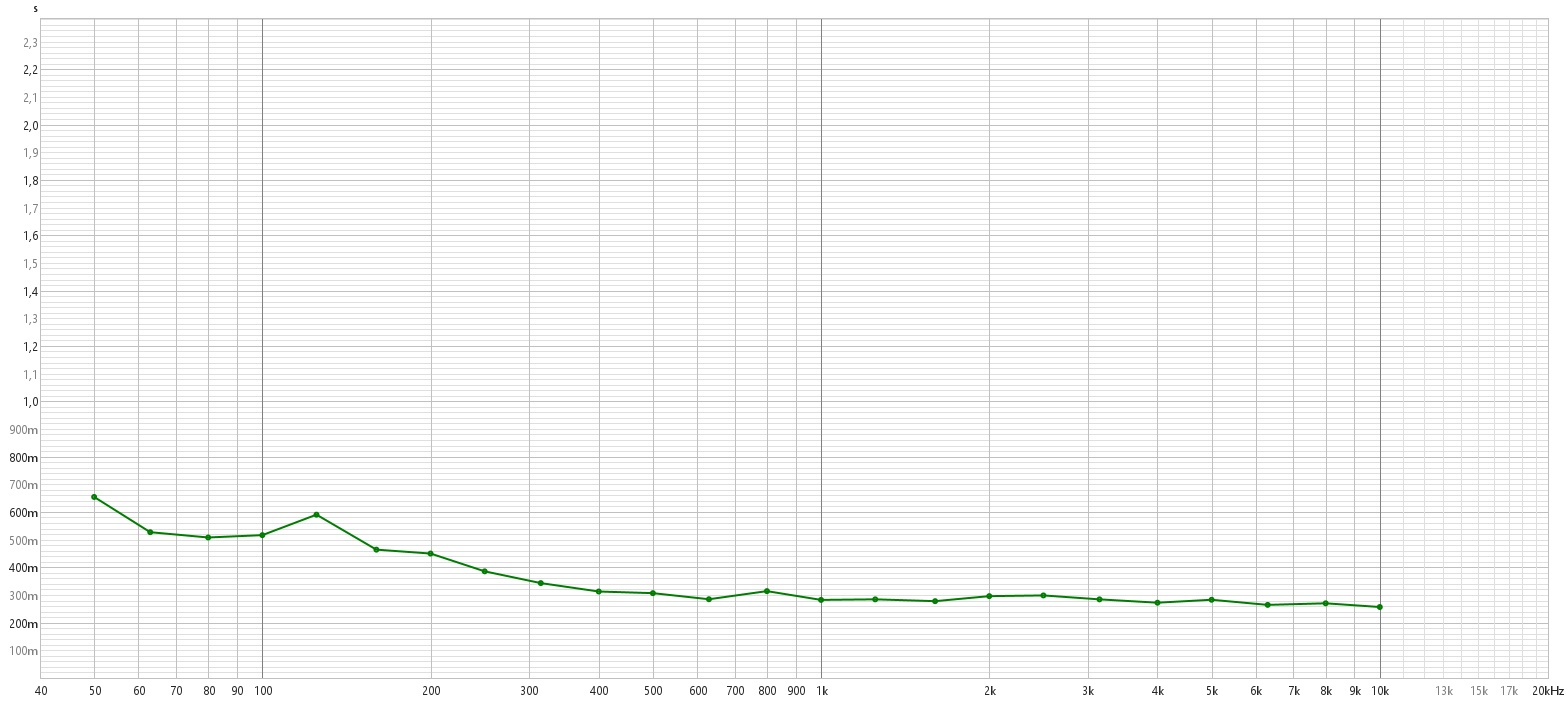
Keeping RT60 between 300 and 400ms was my target (below 300ms it would be way too dry). So the goal is met above 250 Hertz. For the bass response, it is still a bit of a challenge, with too much resonance below 150 Hertz (and you can hear it!).
More Bass Traps!
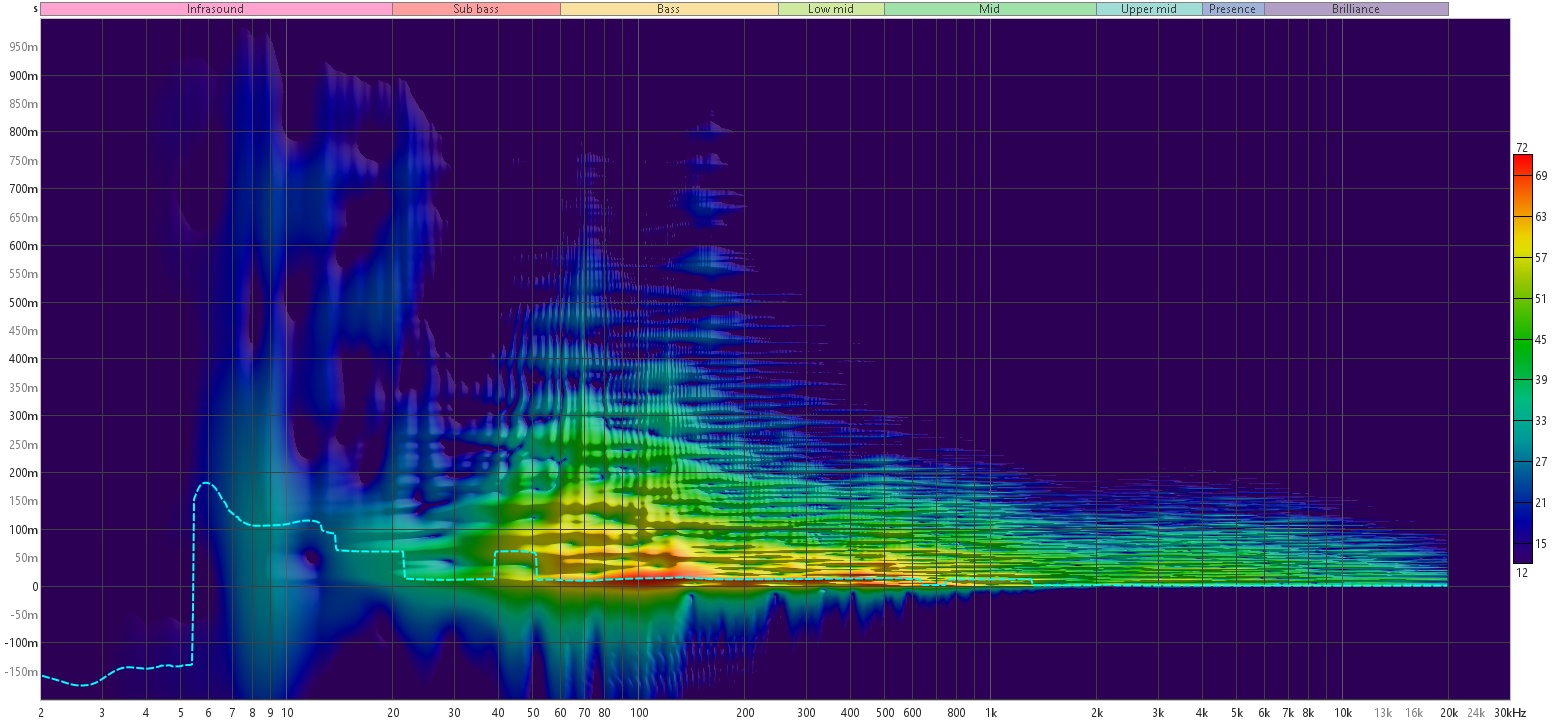
The spectrogram above shows much longer decays around 70 and 160 Hertz, and quite more energy in general in the low end. So I have ordered some extra bass traps that are specialized in absorbing lower frequencies without affecting the high-end too much.
It does make a difference, but I have not taken the time to measure it yet. They may also work better if placed in another area, so I still have to experiment quite a bit. I still get some ugly resonances in the bass region in some areas of the room when playing bass.
So I might want to add some more traps with diffusers on top (to avoid affecting igher frequencies) in the future.
Conclusion
It took some time to get there, but the room is now really nice looking and sounding! Apart from a few problems for bass guitar (mostly solved so far by moving the bass amp in another location), it is sounding fine, and recorded acoustic instruments can be easily processed with artificial reverb and effects without sounding too artificial!
It is a nice place to be and to write/record music, while experimenting with my software in good conditions.
In the next episodes we’ll cover the studio gear and instruments, as well as the software and recording setup. Keep connected!