Recording Studio Build #3 – Walls Insulation & Sound Proofing
Walls are a critical part for soundproofing in my studio: while the roof is mainly diffusing sound towards the sky – well, it’s not entirely true because of diffraction and propagation thru the structure, but still – some of the walls are pointing directly towards the neighbors (the closest neighbor’s house walls being only a few meters away).
They are also in direct contact with the floor which is a vector of propagation of the sound (I do not plan to fully decouple it from the rest of the building – a matter of cost and weight).
So they require a specific treatment, with multiple layers. Here is how it has been done.
Closing The Walls
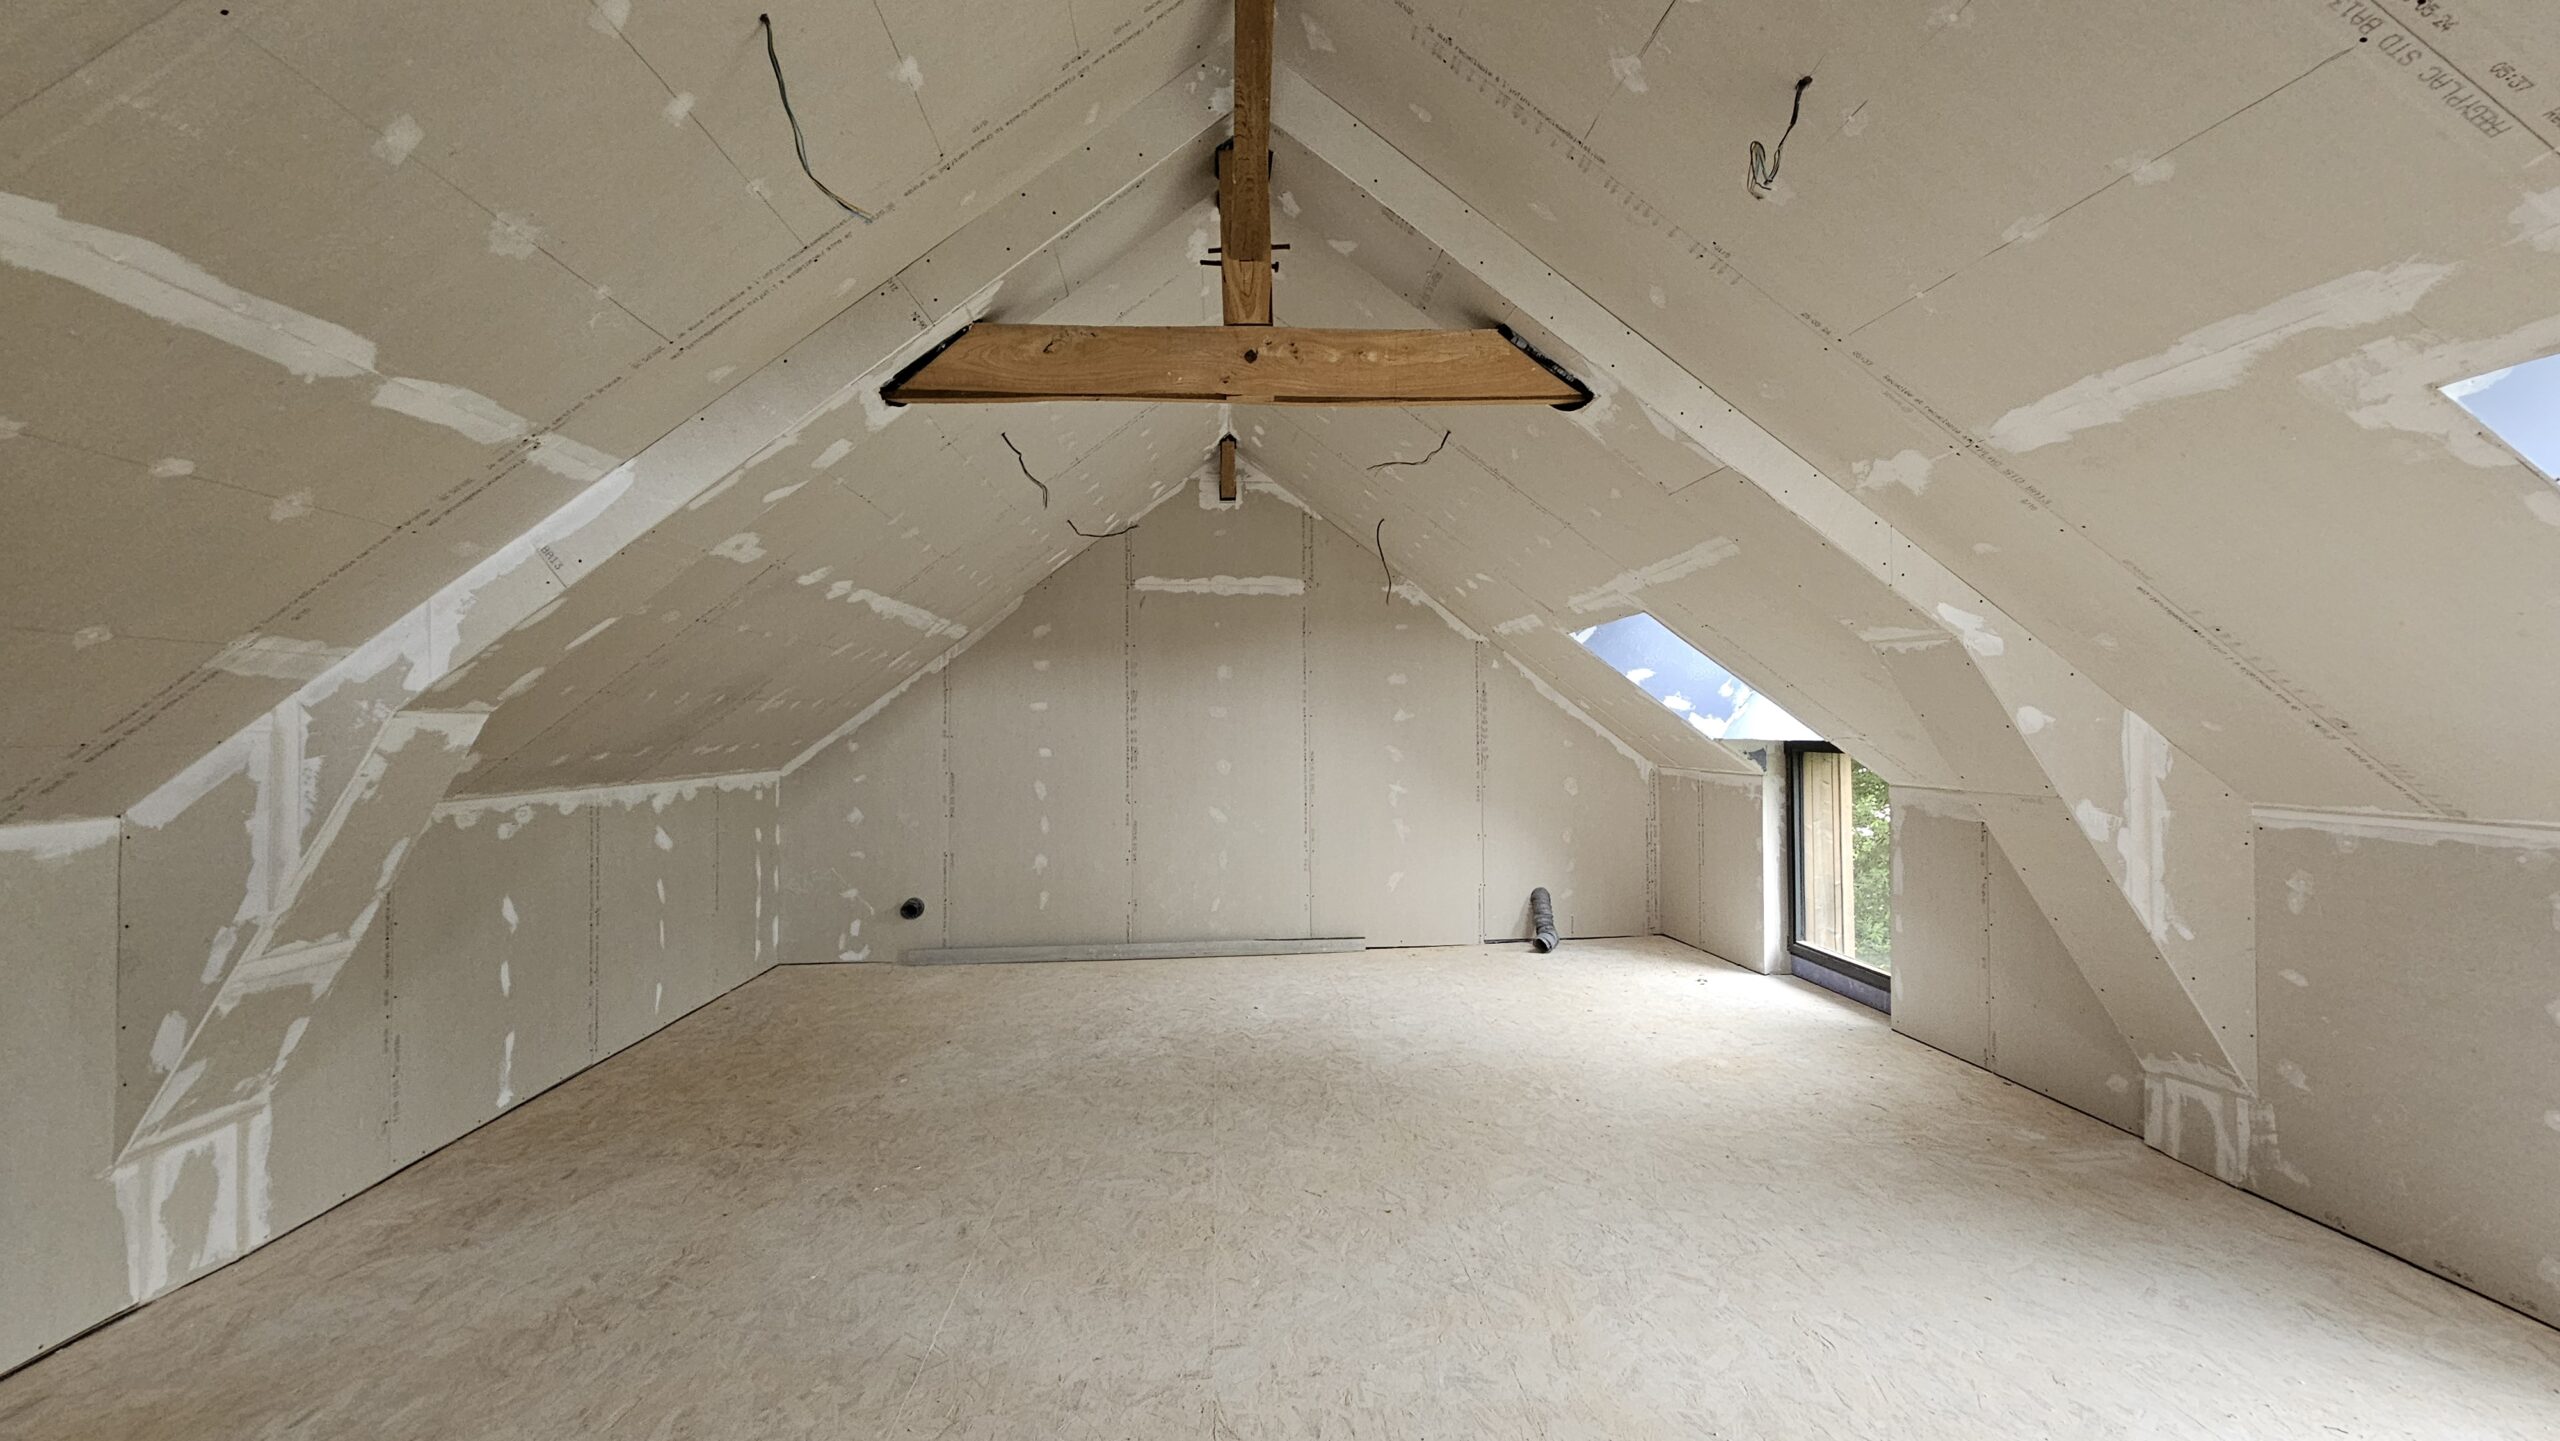
The first step is to close the walls. Currently the only thing that separates the inside of the studio from the outside is thin layer of OSB wood (13mm) – cladding doesn’t really count, it’s definitely not soundproof!

Regarding soundproofing, this thin layer is actually a mistake. I should have probably insisted that the contractors closed the walls with two layers instead to make the walls more rigid. But they used the standard for this type of construction, and with another layer everywhere, maybe the weight would have been a problem.
Anyway, to close the walls, I have first stuffed wood wool everywhere between the beams (145mm), then closed with 13mm OSB and placed acoustic plasterboard on top of it, to make it as rigid as possible.

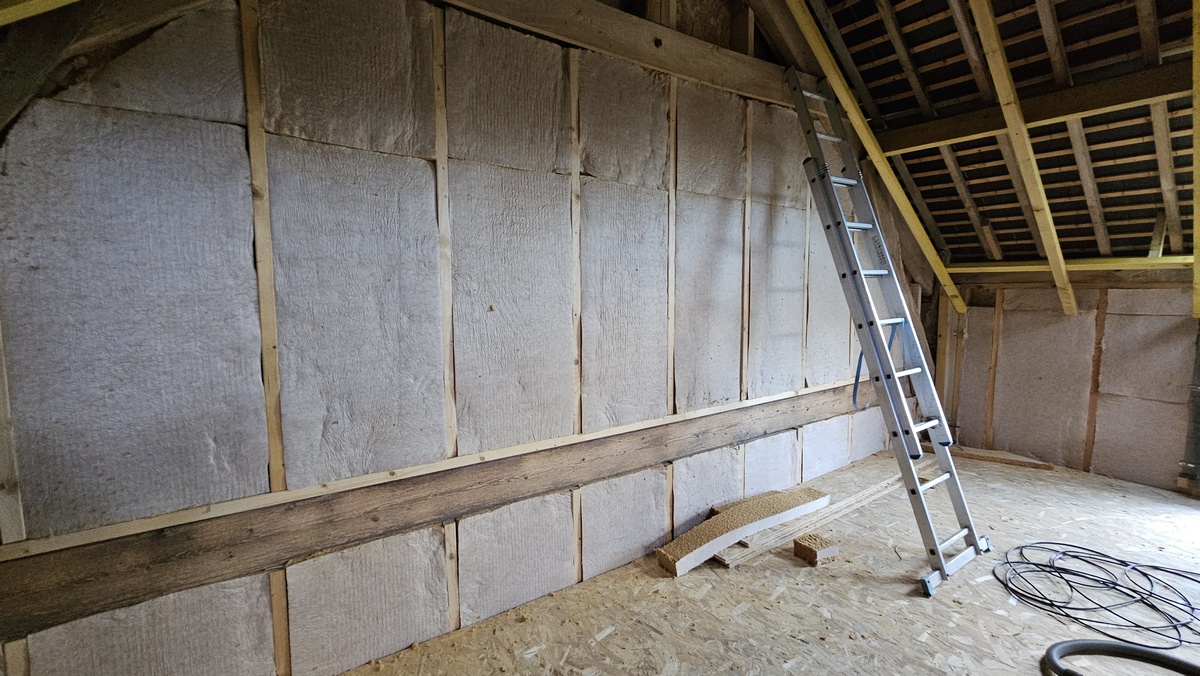


Note: at the point the vibrations are pretty well transmitted to the structure and to the outside. The wood wool avoids resonances inside the wall and adds mass, but since all layers are tightly coupled together via the beams, it’s acts as a single large wall that vibrates transmits sounds to the outside.
Airtightness
At this stage the whole studio is now closed. It is time to make it fully airtight with special tape (usually used for waterproofing in construction). It is indeed important that there is no leak and air cannot move freely between the inside and outside, or the sound will escape easily.
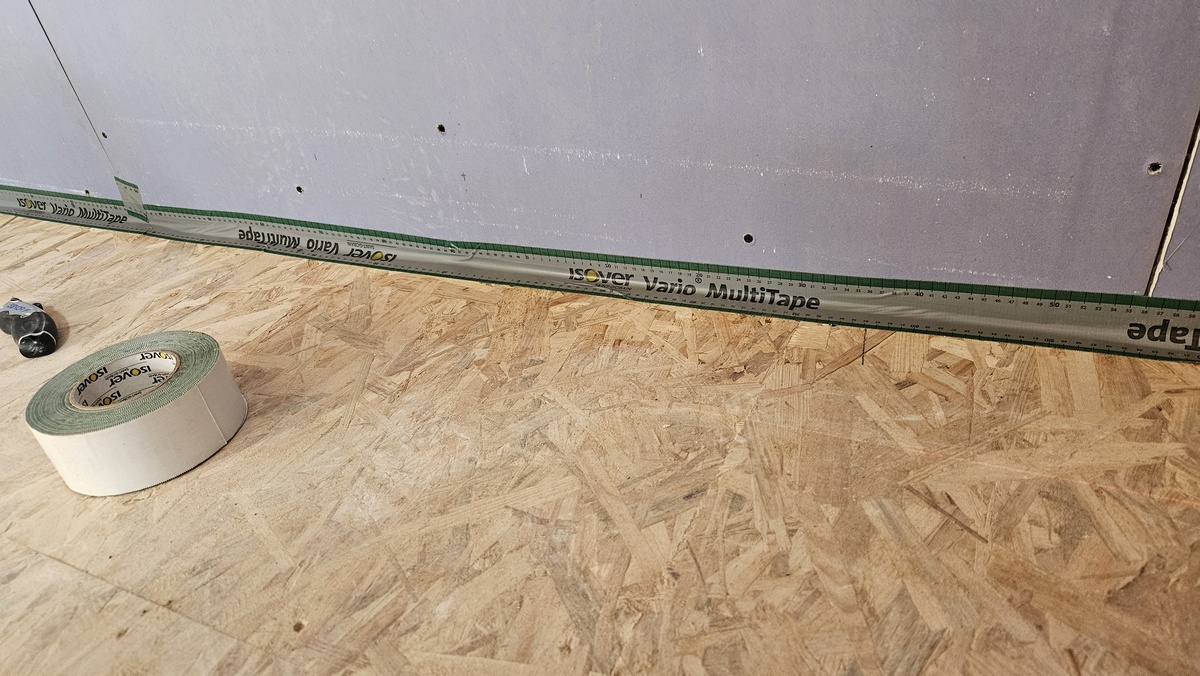
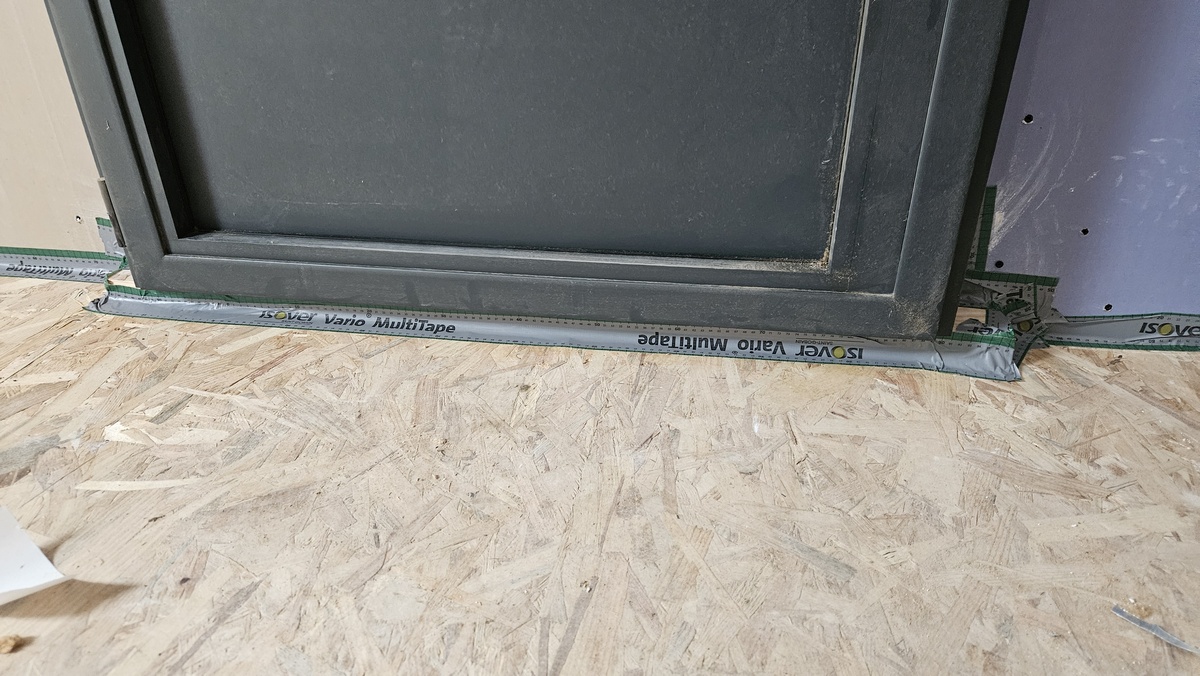
I have tested the difference before and after and it makes a huge for high frequencies (bass does not care about walls anyway!).
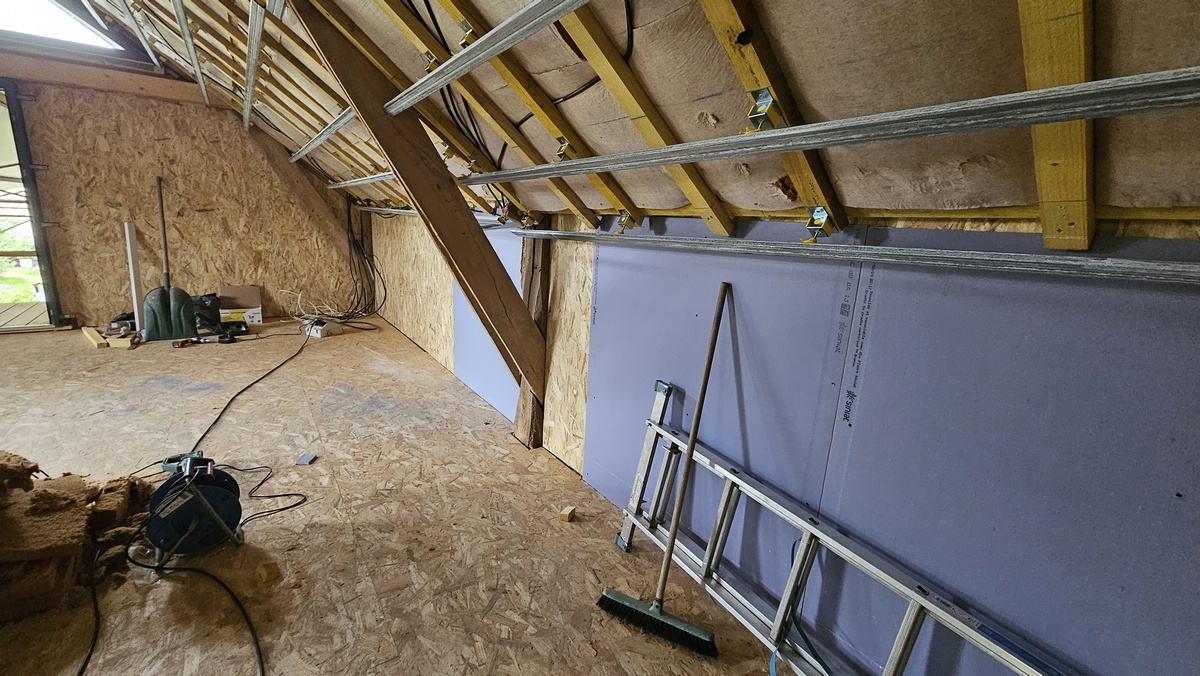
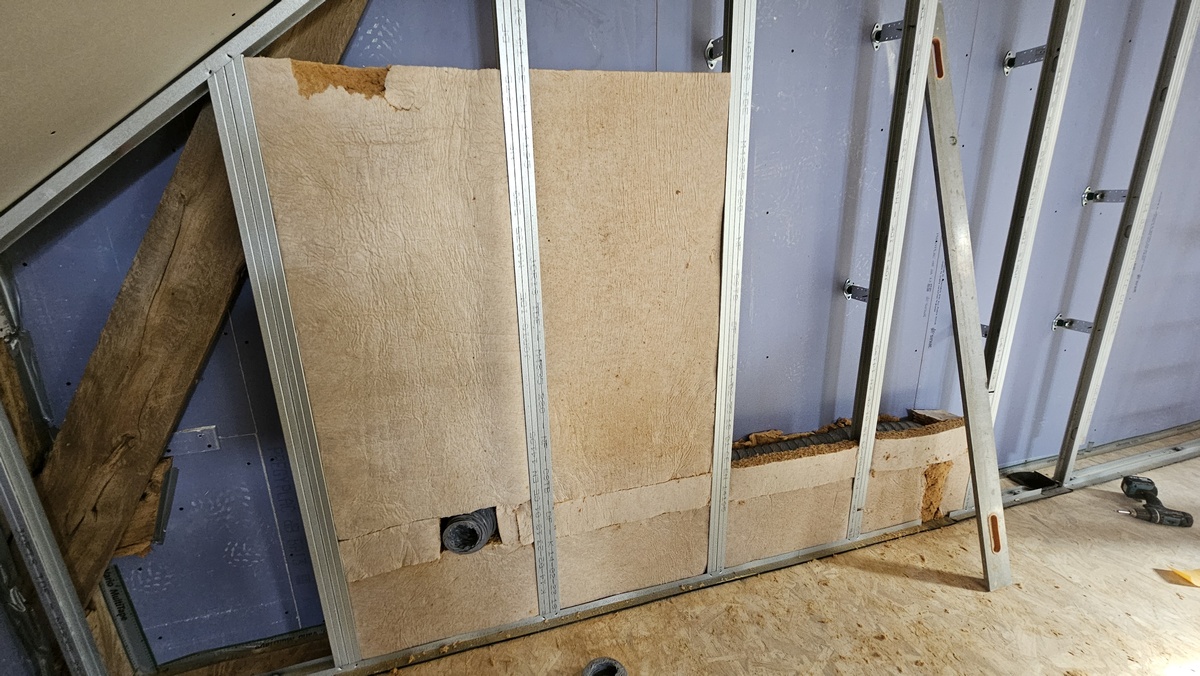
Fully Decoupled Inner Layer
Decoupling
Now that the studio is completely closed and sealed with no air gap, we’ll create an inner layer that is fully decoupled from the rest of the structure, as already done with the ceiling. It is a bit more complicated for walls though, as they are resting on the floor.
While the solution I used for the roof can be found almost anywhere, I have struggled quite a bit to find the appropriate materials to build this structure at a reasonable cost (you can find industrial solutions, but they are way out of budget and would not fit in such a small studio).
I found a company in Spain called SENOR who helped me find the right solution. They have everything you need for such decoupling and gave me pretty good advice, together with fully annotated plans for the installation:

Since my floor will not be fully floating as you usually do for such a studio (too much weight and constraints, and I don’t have neighbors inside the building anyway), I wanted the walls to be fully decoupled from the floor and SENOR offers a simple way to do it which is pretty efficient.

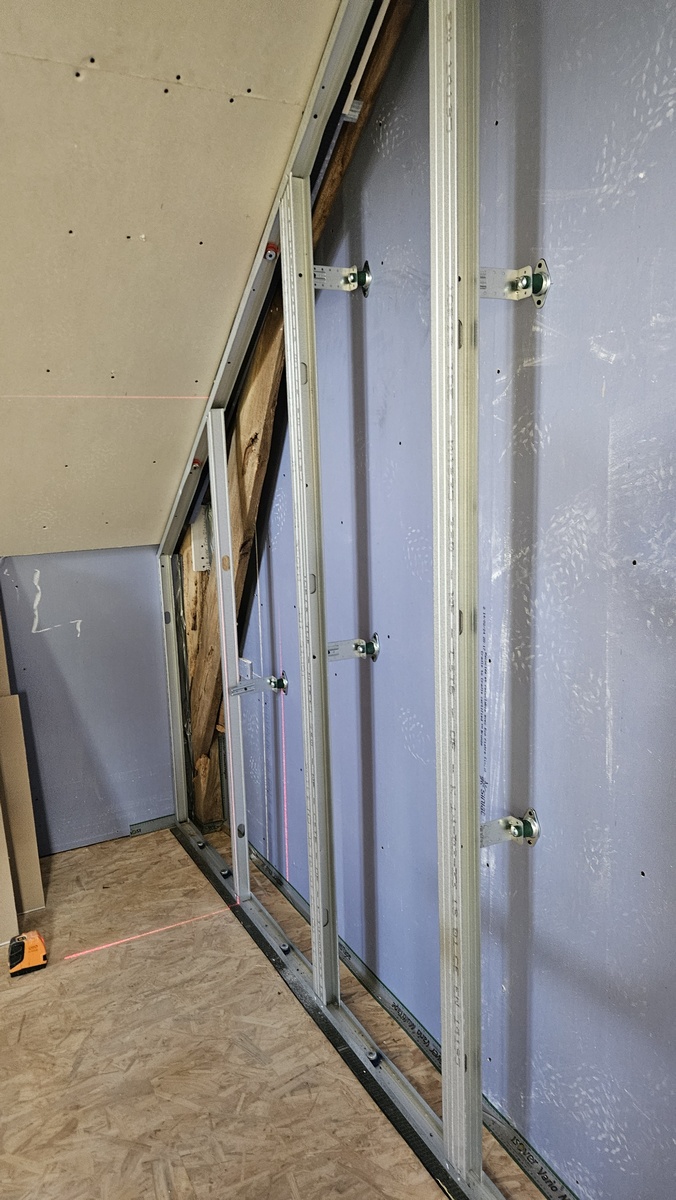


Distance From External Layer
One of the biggest question here is how far away from the outside walls this inner layer is built. The further away, the better the sound proofing (and the lower the cutoff frequency), but obviously the smaller the room!
So it is a matter of compromise. All walls were not done the exact same way (I wanted walls facing towards neighbors to have slightly better soundproofing). The air gap varies from 50 to 150mm, and the wood wool thickness from 100 to 200mm depending on the walls.
Plasterboard Thickness
Just like for the ceiling, I have used two layers of 13mm plasterboard with different densities. The result is very rigid and heavy.
It reverberates a lot (which is a good sign than the sound does not escape much)!
That’s it for the ceiling and walls!
In the next chapter, we’ll see how the floor has been insulated and decoupled from the structure.